

How to sand Poplar Wood Planks?
Nov 06, 2025
Leave a message
Hey there! I'm a supplier of Poplar Wood Planks, and today I wanna share with you how to sand Poplar Wood Planks. Sanding poplar wood planks is a crucial step in getting that smooth, professional finish, whether you're making furniture, building a small project, or just refinishing some old planks.
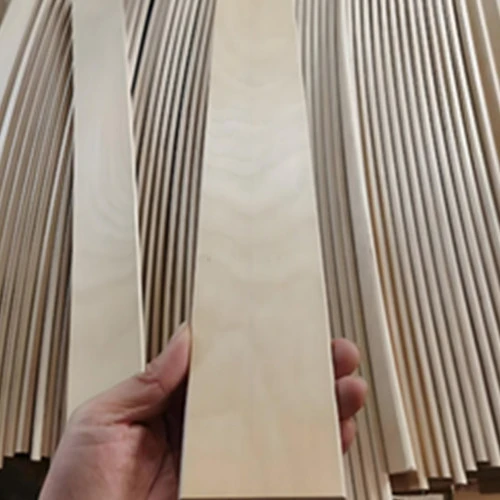

Why Sand Poplar Wood Planks?
First off, let's talk about why sanding is so important. Poplar wood is relatively soft, and it can have a rough surface right out of the box. Sanding helps to smooth out any rough spots, splinters, or uneven areas. It also prepares the wood for staining, painting, or any other finish you want to apply. A well - sanded surface allows the finish to adhere better, giving you a more even and long - lasting result.
Tools You'll Need
Before you start sanding, you gotta gather the right tools. Here's what you'll need:
- Sandpaper: You'll need different grits of sandpaper. Start with a coarse grit, like 80 or 100, to remove any major imperfections. Then move on to medium grits (120 - 150) to smooth the surface further, and finish with a fine grit (180 - 220) for a super smooth finish. You can get sandpaper in sheets or in a sanding block. I prefer using sanding blocks because they give you more control.
- Sanding Block or Orbital Sander: A sanding block is a simple and inexpensive tool. You just wrap the sandpaper around it and start sanding. An orbital sander, on the other hand, is a power tool that can save you a lot of time and effort, especially if you have a large area to sand. It moves in a circular motion, which helps to prevent sanding marks.
- Dust Mask and Safety Glasses: Sanding creates a lot of dust, which can be harmful if you inhale it. A dust mask will protect your lungs, and safety glasses will keep the dust out of your eyes.
- Vacuum or Brush: To clean up the dust after sanding, you can use a vacuum cleaner with a brush attachment or just a regular brush.
Preparing the Poplar Wood Planks
Before you start sanding, you need to prepare the poplar wood planks. First, check the planks for any nails, screws, or other metal objects. These can damage your sandpaper and the sander. Use a nail puller or a screwdriver to remove them.
Next, clean the planks to remove any dirt, debris, or grease. You can use a damp cloth to wipe them down. Make sure the planks are completely dry before you start sanding.
Sanding Process
Step 1: Coarse Sanding
Start with the coarse - grit sandpaper. If you're using a sanding block, wrap the sandpaper around it tightly. If you're using an orbital sander, attach the sandpaper to the sander according to the manufacturer's instructions.
Sand the poplar wood planks in the direction of the wood grain. This helps to prevent scratches and gives you a more even finish. Apply even pressure as you sand, and keep the sanding motion smooth. If you're using an orbital sander, move it in a slow, circular motion across the surface of the plank.
Coarse sanding is all about removing the major imperfections, like rough edges, bumps, and old finishes. Keep sanding until the surface feels relatively smooth, but don't worry about getting it perfect at this stage.
Step 2: Medium Sanding
Once you've finished the coarse sanding, switch to a medium - grit sandpaper. This will help to smooth out the surface even more and remove any scratches left by the coarse sandpaper.
Again, sand in the direction of the wood grain. Use a light touch and make sure to cover the entire surface of the plank. You may notice that the wood starts to look smoother and more uniform as you sand with the medium - grit paper.
Step 3: Fine Sanding
The final step is fine sanding. Switch to a fine - grit sandpaper, like 180 or 220. This will give the poplar wood planks a super smooth finish, almost like glass.
Sand very gently in the direction of the wood grain. You don't need to apply much pressure at this stage. Just let the sandpaper do the work. Take your time and make sure to cover every part of the plank.
Cleaning Up
After you've finished sanding, it's time to clean up the dust. Use a vacuum cleaner with a brush attachment to suck up as much dust as possible. Then, use a clean, dry cloth to wipe down the planks and remove any remaining dust.
Finishing the Poplar Wood Planks
Once the planks are sanded and clean, you can apply the finish of your choice. You can stain the wood to bring out its natural beauty, or you can paint it for a more colorful look. Make sure to follow the instructions on the finish product for the best results.
Our Poplar Wood Planks
As a supplier of Poplar Wood Planks, I can tell you that our planks are of the highest quality. We source our poplar wood from sustainable forests, so you can feel good about using our products. Our planks are perfect for a wide range of projects, from building Poplar Bed Slats to creating Carbonized Boxwood Straight Board.
If you're interested in purchasing our poplar wood planks, or if you have any questions about sanding or using them, don't hesitate to reach out. We're here to help you with all your woodworking needs.
Conclusion
Sanding poplar wood planks is not as hard as it may seem. With the right tools, a little patience, and some practice, you can achieve a smooth, professional finish. Remember to start with a coarse grit, move to a medium grit, and finish with a fine grit. And always sand in the direction of the wood grain.
If you're in the market for high - quality poplar wood planks, we're the supplier for you. Contact us today to discuss your project and find out how we can help you get the best results.
References
- Woodworking Basics: A Guide to Sanding Wood, DIY Woodworking Magazine
- Poplar Wood: Properties and Uses, Forest Products Journal